 Download
 Order
OrderHow to Restore Water-Damaged Photos
Water damage can be quite frustrating, especially when it affects cherished photographs that hold precious memories. This can happen due to a humid environment, condensation, a leaking roof, or flooding, causing photos to fade, warp, or become covered in unsightly stains and even mold. However, it is possible to restore water-damaged photos! You just need the right techniques and tools to bring them back to life.
Here we'll show you how to save water-damaged photos — first manually at home, then with the help of special restoration software — and give you some tips on preventing a similar situation in the future.
Water-Damaged Photo Restoration – Easy Steps
Ready to save your water-damaged photos? Take a look at our guide below and find out what you can do to bring your cherished images back to life:
1. Prepare All the Necessary Equipment
For a successful water-damaged photo restoration, gather the following essential items before starting.
- Distilled water
- Soft-bristled brush
- Disposable aluminum foil pans
- Absorbent materials for drying
These supplies are typically available at home improvement stores and supermarkets. Using clean, absorbent materials like blotter paper, plain white paper towels, or clean cloth towels provides a suitable surface for drying your photos, helping to prevent further damage.
2. Place the Water-Damaged Images in the Foil Pan
Pour the distilled water into two aluminum foil pans. Put your water-damaged photos into the pans and let them sit for a few minutes. Don’t worry, this type of water is great for cleaning fragile pictures because it doesn't contain impurities that could further damage them.
3. Brush Away the Dirt
Gently sweep away any dirt with a soft-bristled brush. Don't apply any pressure to the surface of the photo to avoid further damage. Then, carefully transfer the water-damaged pictures to the second pan with clean distilled water to rinse off any remaining dirt. Leave them in the water for up to 30 minutes. This will help dissolve both dirt and whatever holds them together, allowing you to easily unstick water-damaged photos from each other.
4. Leave the Photos to Dry
Carefully remove the photos from the water and place them face up on a clean, absorbent surface like paper towels. Avoid using newspapers or printed paper towels, as the ink may stain your damp images. Change the absorbent paper every hour until the pictures are completely air dried.
 Word of Advice
5. Digitize Your Photographs
After all the manual actions are done and your pictures are in better condition than before, you should now transfer them to digital form. Check out how to digitize photographs and at least save the digital copies from possible water damage in the future. Better yet, you can continue restoring water-damaged photos with some image restoration software.
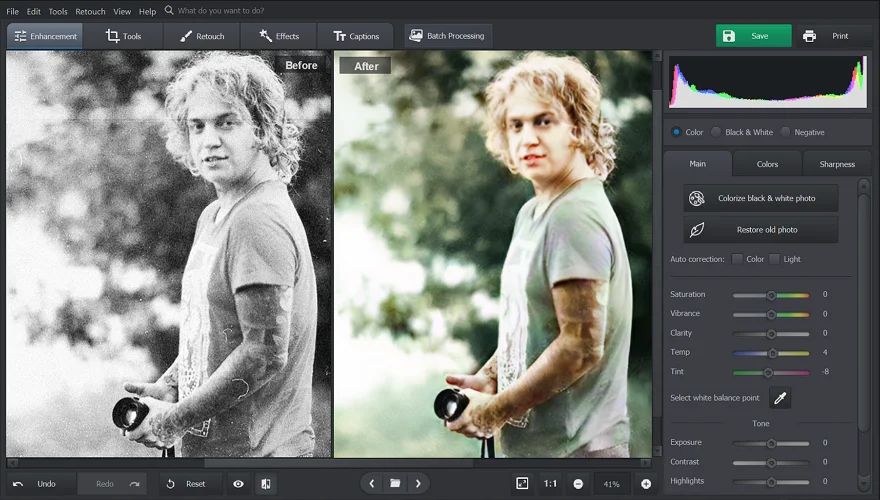
6. Restore Water-Damaged Photos with PhotoGlory
Want to bring pictures back to their original look or even give them a modern touch? Try fixing water-damaged photos with PhotoGlory, powerful software to restore old photos. It lets you get rid of all the nasty imprints of time and bring back vibrant colors in a click. You can crop torn edges, remove stains & scratches, colorize black-and-white pictures, reassemble ripped images, and much more. Check out the article about how to make old photos look new and get a walkthrough of the entire process.
To be certain, there are several other programs you can also use. For instance, you may want to explore how to fix old photos in Photoshop or try tools like GIMP, Luminar AI, or Fotor for photo restoration. Each of these programs offers various features to help repair and enhance damaged pictures, from removing scratches to adjusting colors.
Can water-damaged photos be repaired? Sadly, a complete restoration is not always possible. But now you know how to minimize the damage and give your photos a longer life. Besides, with a digital restoration method, you can achieve more sophisticated improvements than with manual ones.
Word of AdviceHow to Keep Your Photos Safe from Water Damage in the Future
Better safe than sorry, so it's crucial to take precautions to protect your photos from water damage in the first place. Here’s what you can do to avoid such an issue later on:
- Store your photos properly. For safe storage of restored photos, use albums with acid-free photo corners or archival photo sleeves and keep them away from areas prone to leaks or flooding.
- Have digital copies. Scan and save photos to your hard drive or cloud storage to ensure that even if the physical copies are damaged, you will still have access to your cherished memories.
- Act as fast as possible if such a disappointment happens again.Immediately remove the photos from the water and follow the manual restoration steps above. If the water-damaged photos stuck together, gently separate them to prevent further damage. Prompt action can minimize the amount of damage and increase the chances of saving your precious pictures.
As promised, we’ve shared with you how to restore water-damaged photos — first by cleaning them manually, then by fixing blemishes in a photo editor to restore them digitally — and how to keep them safe from future damage. Now, with PhotoGlory, you can restore your family pictures with a few clicks and cherish these memories for generations to come, thanks to the powerful AI-driven tools in this beginner-friendly software. Give it a try — it really works!
 Free Download