 Download
 Order
OrderHow to Restore Old Photos in Photoshop
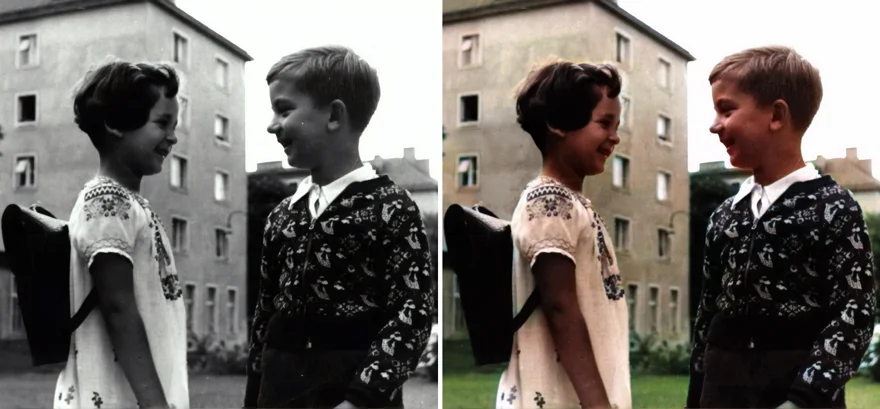
There are lots of restoration services that allow you to bring damaged photos back to their original quality. However, a lot of money might go out of your pocket if you’re planning to fix many photos at once. But there’s a better way to do it – restoring old photographs in Photoshop! And we’re going to show you the editing process step by step.
Editing pictures with such advanced software can be challenging though. But it is not the only way. You’ll also discover 4 alternative programs compatible with Windows, macOS, iOS, and Android. So, you can find a suitable option for the device at hand, if you don’t want to restore old photos with Photoshop. Now, let’s see some of the best ways to bring your pictures into the 21st century!
How to Fix Old Photos in Photoshop - from A to Z
Photoshop is a popular photo editor that offers mighty functionality for restoring old photos. It has a range of selection tools that can help you remove damages and features for correcting colors in faded images. However, this is a destructive photo editor - the program saves the changes over the original picture. So, you need to keep copies of your files. If you don’t mind that, follow these instructions to give your pictures a fresh look with Photoshop:
Step 1. Select Photos for Restoration
First, look through your photographs and choose those that you need to correct. Sort out duplicates and pictures that are not worth editing.
Step 2. Digitize Your Images
Next, create digital copies of your prints to keep the original photos untouched. Check out this guide on how to digitize old photos for some help with this step.
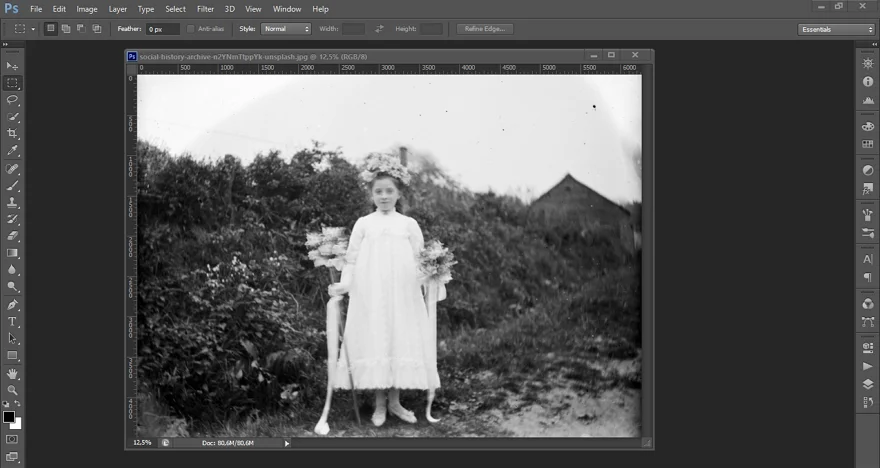
Step 3. Import a Picture
After you launch the software, go to File and click Open. Now select the needed image and open the photo in full screen mode.
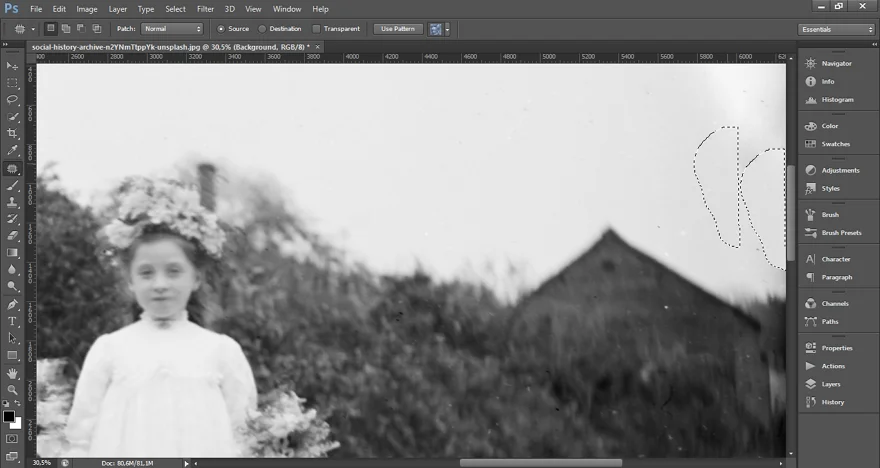
Step 4. Remove the Damage
It’s better to create a new layer before making any changes - click Layer, choose New, and select Layer. Then, choose one of the selection tools for fixing old photos in Photoshop depending on the kind of damage your picture has.
For example, use Spot Healing Brush Tool for removing scratches and spots. Turn on the Content-Aware mode and draw over the defects. A quick note here - remove them by several segments rather than painting over the whole defect area at once. For smaller parts, pick the Clone Stamp tool. Press the Alt key and click to copy the needed area. Then place the selected part over the defect. If a big area is damaged, the Patch tool will help you fix it. Roughly draw over a part of your image, drag the selection, and the program will blend it in.
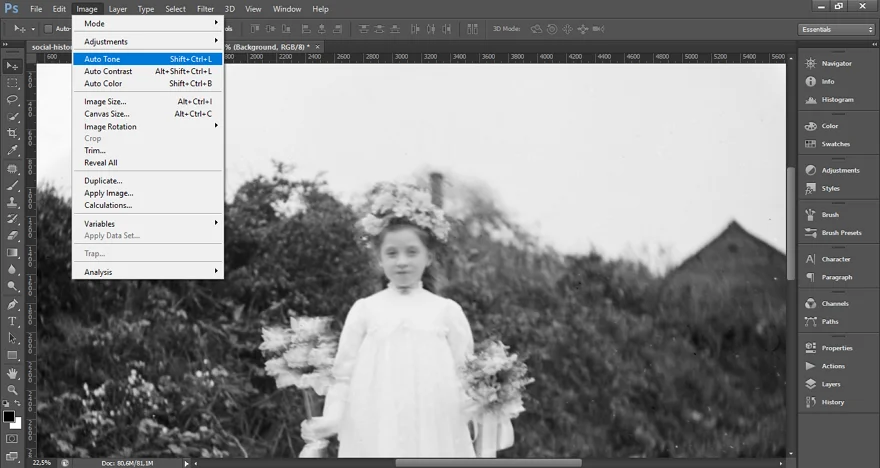
Step 5. Use Color Correction Tools
Once you restore your old photos in Photoshop, get down to color correction. To apply automatic adjustments, use Auto Tone, Auto Contrast, and Auto Color. If you’re not happy with the result, fix colors manually. You can change the RGB levels in the RGB menu by dragging the sliders.
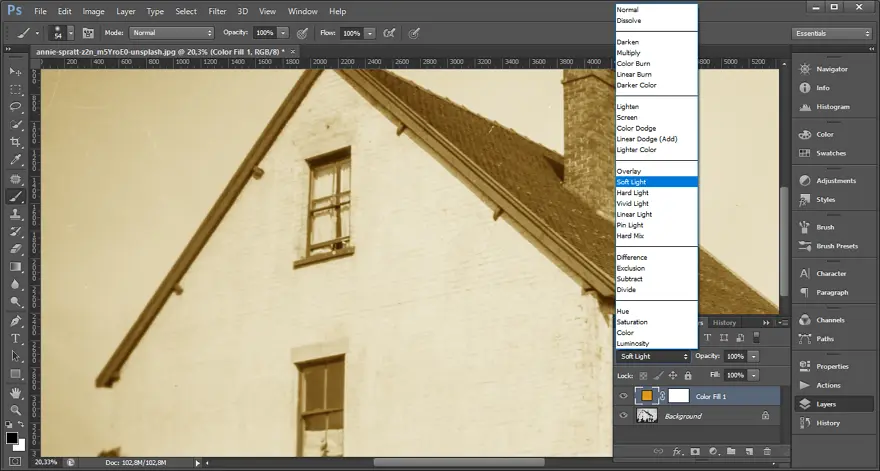
Step 6. Colorize Your Photo (Optional)
You can also add color to your photo. But keep in mind that this is a manual feature, so the coloring process might take you some time. To do so, you need to create a Solid Color adjustment layer for each color you’re going to use and choose the Soft Light mode. Select the needed color tone with the Color Picker tool and hit OK.
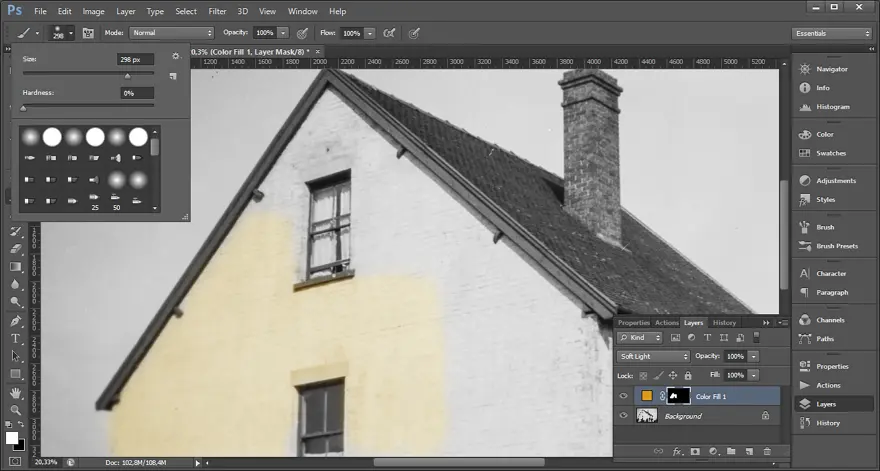
Then, click on the white layer and press Ctrl+i to convert it to black. Finally, paint over the area you want to colorize with that color using Brush Tool. It’s better to zoom in and change the brush size to paint more precisely. Once you’re done with the color, you need to create a new adjustment layer with another color and repeat the actions.
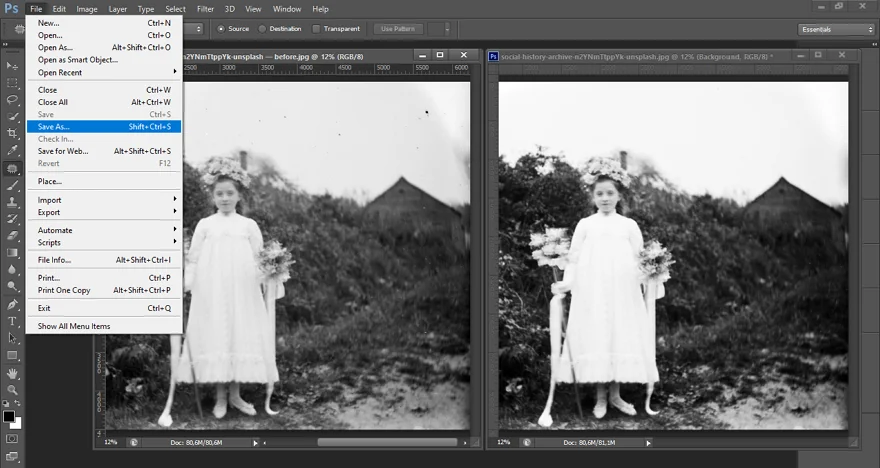
Step 7. Export the New Image
Whether you colorize your picture or not, the exporting process is the same. To save the restored photo, open File, click Save As, and choose the needed file format and destination folder. To save the project for further photo restoration in Photoshop, it’s better to use the PSD file type. As for the final result, pick JPEG or PNG options.
Would you like to see the steps in action? Watch this video tutorial and edit your own pictures by following the instructions:

This is it! Now you can make old photos look modern using this popular software.
Old picture repair with Photoshop is quite effective. But you need to put in a little extra effort to master the program and achieve a satisfying result. Besides, the subscription-based pricing plans might not be suitable for everyone. So, let’s take a look at some budget- and user-friendly options for computers and smartphones that might work better for you.
1. Restoring Old Photos on Windows
It’s easier to edit old photos in dedicated software than with an all-in-one photo editor. One of the best options you can use is PhotoGlory, widely regarded as one of the best photo restoration software for a PC. It has a beginner-friendly interface, so you’ll figure it out effortlessly even with zero experience. So, if you’re wondering how to fix old photos in a few clicks, PhotoGlory is the answer.
This software lets you instantly correct damaged areas in your photos, remove dust, and denoise your pictures. It also has an AI-powered tool that helps you colorize black and white photos automatically. But you still have control over the process - you can tweak colors manually and remove defects with clone stamp, patch, and healing brush. PhotoGlory also has a batch processing mode for editing piles of old photos at once. Want to give it a try? Then follow these simple steps:
Step 1. Import Your Picture
Drag and drop the needed image to the startup screen or click Add Photo.
Step 2. Fix Damaged Areas
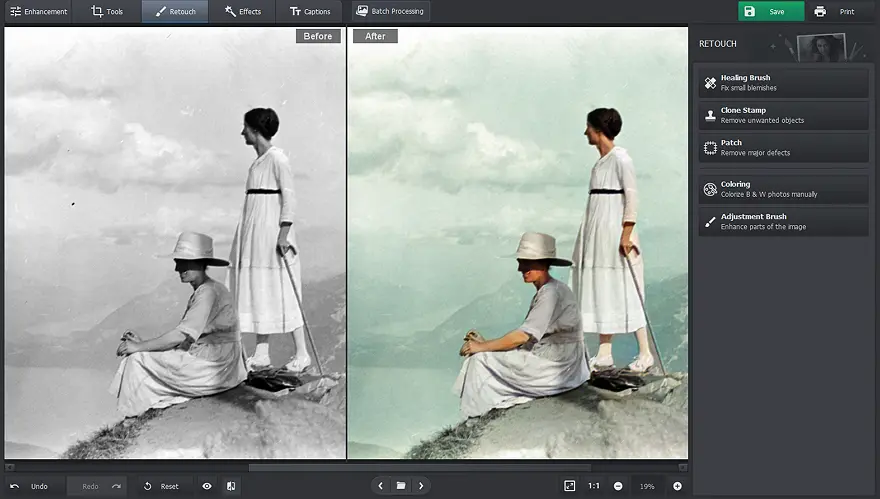
If you want to repair pictures automatically, hit the Restore Old Photo button. To make adjustments yourself, open the Retouch tab, select the Healing Brush tool, and paint over small defects. The Clone Stamp and Patch tools work better for removing bigger damages - you need to choose a source area and blend it in to conceal a defect.
Step 3. Colorize Your Photo
To convert a black-and-white picture to color, click Colorize Black & White Photo. When the colorizing process is complete, you can modify the result to your liking.
Bringing old photos to life is no big deal if you have an easy-to-use desktop program. In PhotoGlory, you can edit your pictures in a couple of clicks. But this software is only available for Windows.
 Word of Advice
2. Old Photo Restoration on Mac
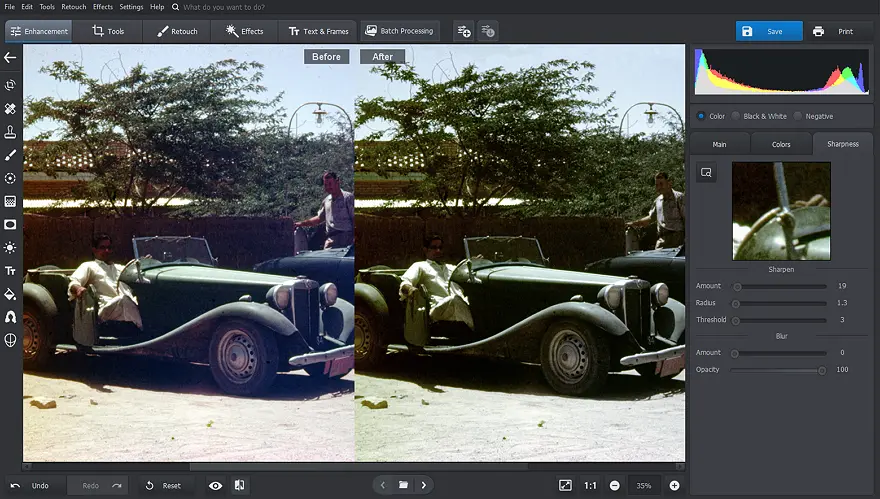
If you want to work on your family photos on Mac, you can use PhotoWorks, photo restoration software with AI-powered tools. This is a non-destructive photo editor, so it doesn’t alter the original pictures like Photoshop does. In this software, you can fix the colors using HSL sliders, RGB curves, filters, 3D LUTs, and Lab Colors. PhotoWorks also offers standard editing tools like cropping, correcting lens distortions, and resizing. Let’s see what fixing old photos on Mac is like:
Step 1. Load a Picture
Click Open Photo to select the image you need to edit.
Step 2. Repair Your Photo
Under the Retouch tab, choose the Clone Stamp or Patch feature, and select the damaged part. Then you need to replace it with the source area you pick. You can also use a healing brush to select minor defects for automatic removal.
Step 3. Improve the Quality
If an old picture is blurry, enhance the quality by dragging the Clarity or Contrast sliders in the Main settings. You can also sharpen your image under the Sharpness tab by tweaking the Amount, Radius, and Threshold values. To make it look clearer, select the Dehaze tool and move the slider to the right.
PhotoWorks is a beginner-friendly Photoshop alternative with lots of manual and automatic editing tools. You can edit your old photos even with little experience. But the photo editor doesn’t offer mobile or online versions.
3. Restoring Old Photographs on Android
Need a mobile app to quickly tweak pictures on an Android device? Then download FixMyPics on your smartphone. This program allows you to repair your photos by removing stains, tears, and dust. It also helps you make faded colors more vibrant and fix old black and white photos. But keep in mind that the edited images might get blurry after being saved. You also need to watch ads to edit each image if you’re using the free version of the program. Don’t mind that? Then, let’s see how you can edit old damaged photos with FixMyPics:
Step 1. Repair Your Photo
Select the Descratch function and import a picture to give it a cleanup. Choose between Smooth and Sharp options and preview the result.
Step 2. Add Colors to the Image
To convert grayscale pictures to colorful, use the Colorize tool. Adjust the Intensity and Brightness settings and launch the coloring process.
This is how you make old photographs look modern using your Android tablets and smartphones. If you prefer automatic programs, FixMyPics can meet your needs. But the mobile app does not allow you to restore damaged images yourself.
Word of Advice4. Old Picture Restoration on an iPhone
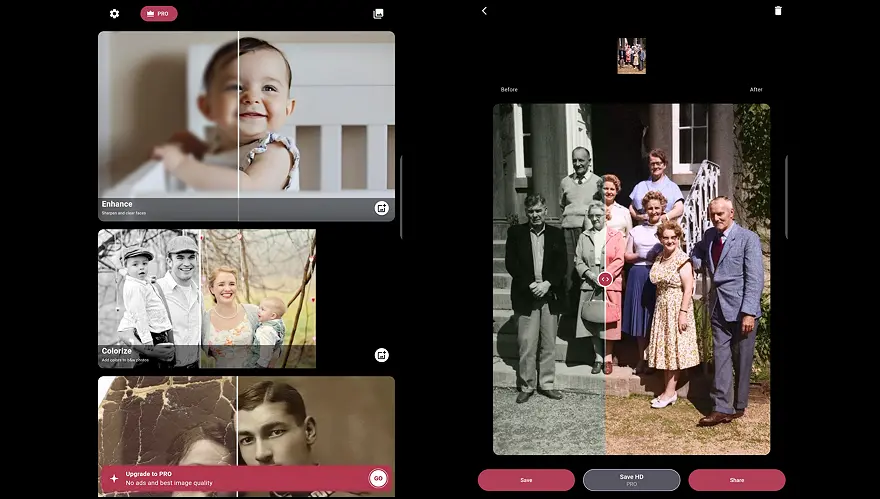
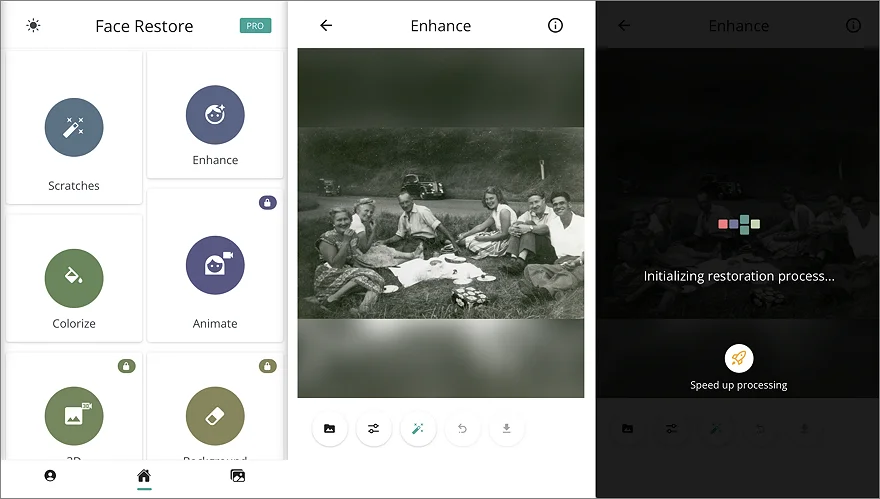
Editing damaged photos is also possible on an iPhone and iPad using Face Restore. With this mobile app for old photo restoration, you can fix red eyes in pictures, remove scratches, and correct colors. Another standout feature you might like is erasing glasses from images. It also lets you delete the photo background and improve the overall quality. However, some users have complained that the colorizing tool doesn’t work well. If you still want to try the app, follow these steps to repair old photos:
Step 1. Remove Scratches from an Image
Open the Scratches feature and load a file from your gallery. Hit Begin and select the damaged area with a brush. Then start the editing process by tapping the magic wand.
Step 2. Colorize a Grayscale Image
Tap the Colorize button, hit Begin, and adjust the painting settings.
As you can see this app lets you fix damages in a few taps. But be ready for incorrect enhancements as automatic tools might not work well every now and then.
How to Restore Old Photos in Photoshop: Summary
There are countless ways to repair damaged pictures. The first method that comes to mind is restoring old photographs in Photoshop. This popular program has a range of features for editing your images, and we’ve shown how to use some of them in this guide.
But, to fix old photos, Photoshop is not always required. In some cases, it’s better to colorize your photos and tidy things up using some other photo editors. With desktop programs like PhotoGlory for Windows and PhotoWorks for Mac, you can easily colorize a black & white photo without Photoshop. For restoring pictures on the go, download mobile apps such as FixMyPics or Face Restore. So, choose one of the programs and bring your pictures back to their original condition without leaving the comfort of your home!
 Free Download