How to Make Old Pictures Look New in No Time
No fragile thing can last forever. Especially old photos. Time is ruthless, that’s why your old pictures start to fade and crack to the point when you can barely make them out. Let’s defy time and turn it back with PhotoGlory! With this easy-to-use old photo editor, you can effortlessly make your pictures look as if they are freshly printed! Curious? Then let’s find out how to make old photos look new!
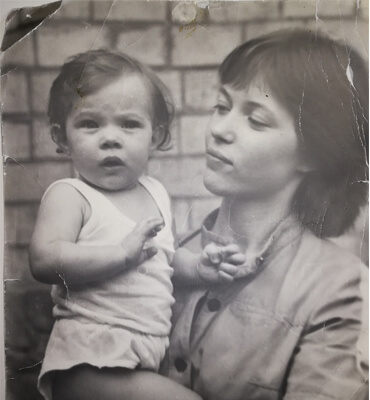
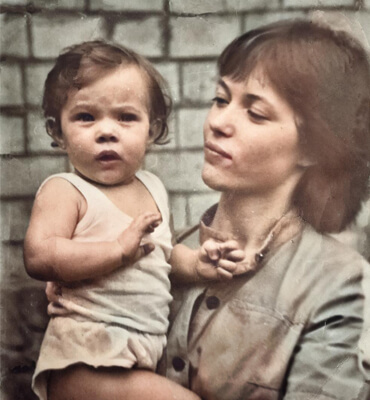
Looks impressive, right? You can do the same with your vintage photos. It’s not as hard as it might seem - you can make your old photo look new in just 5 simple steps! Here they are:
Step 1. Digitize Your Photo
Before you start, you’ll have to create a digital copy of your photo. You can simply scan the picture, then save it on your hard drive. Research the best photo scanners for old photos that fit your budget and needs. Another option is to reshoot the picture with a digital camera or even with your phone.
Step 2. Open the Digitized Copy in PhotoGlory
Now you need a photo editor designed to mend old photos. We’ll go with PhotoGlory. Hit the green button below and download this smart photo editor for free.
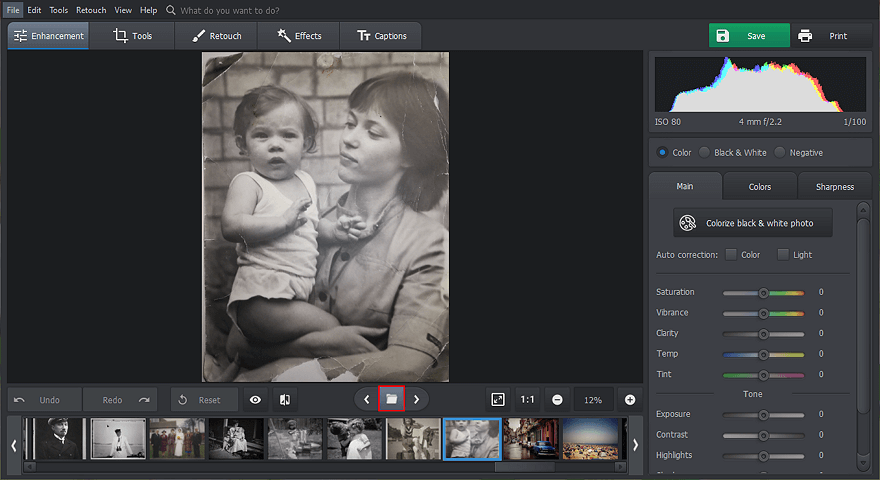
Follow the wizard instruction to install the software on your computer, then start it. Click Open Photo and choose your pic from a folder in your PC. You can also drag and drop your image into the software.
Step 3. Crop Out Torn Corners
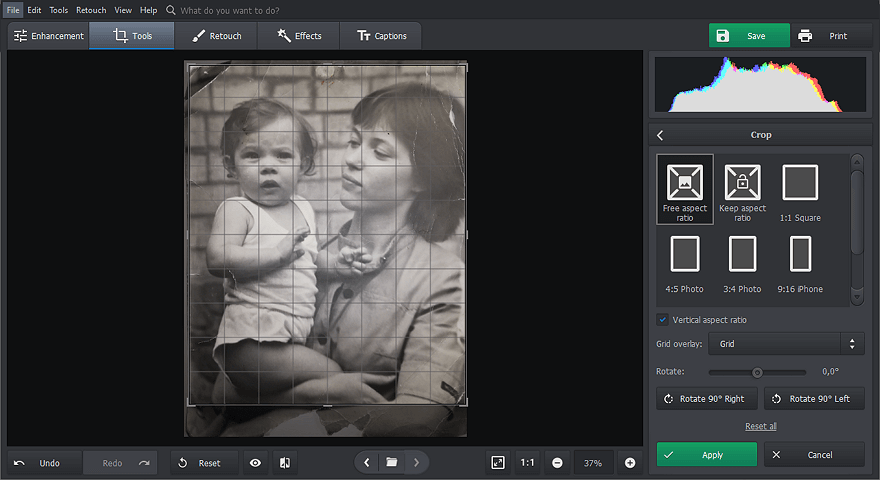
The first step in making old photos look new is cutting away all the torn edges. Go to the Tools tab and select the Crop tool. Adjust the cropping frame so that the battered edges are outside it. Then cut away all the damage.
Step 4. Remove Scratches, Tears, & Stains to Make an Old Picture Look New
Go to the Retouch tab. Here you’ll find three smart tools to erase almost any defect from your old photo - from larger blobs to smaller rips. Let’s see how they can mend your photo.
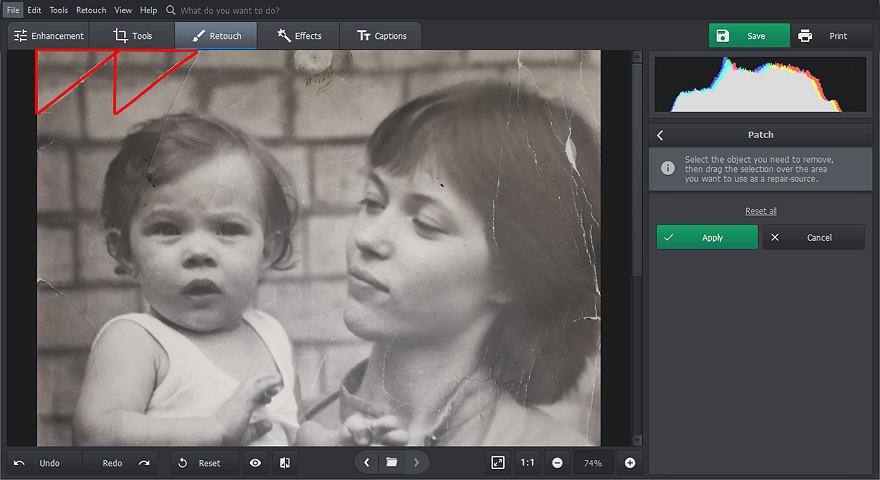
- The Patch
First, get rid of the bigger defects like stains or tears with the Patch tool. Just draw a selection around the flaw, then move it to various spots until you find a good source for the patch. Make the patch blend in seamlessly. - The Clone Stamp
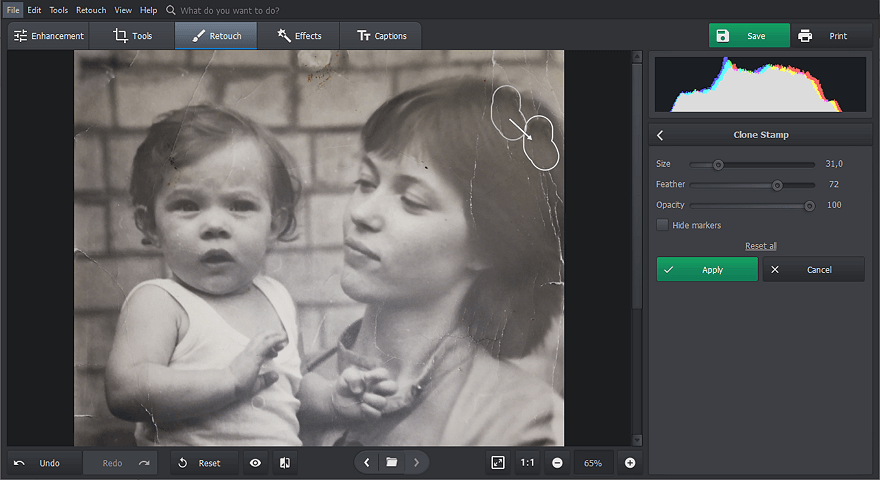
The Clone Stamp tool is perfect for erasing medium-sized defects. All you need is to paint over the defect, then choose the clone source that will cover it up. - The Healing Brush
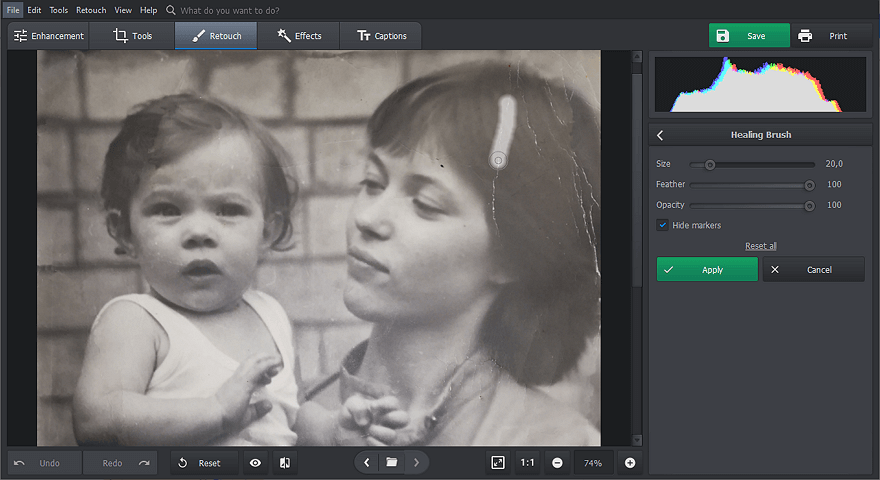
Finally, get rid of all the small creases and tears with the Healing Brush. Just brush over the defect, and the tool will blend it into the rest of the pic. There you go! Click the Before/After button to see how the picture has improved.
Step 5. Add Color to Your Old Photo
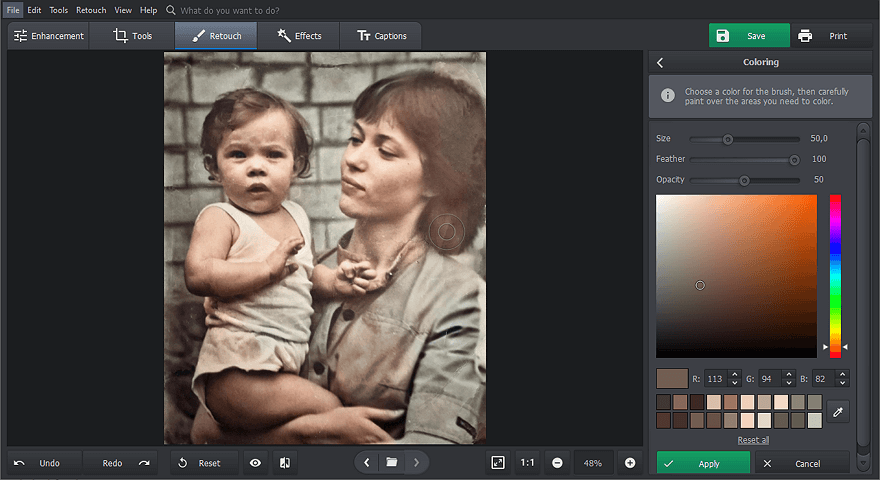
If your picture is black and white, you can colorize it in a click. Switch to the Enhancement tab and click the Colorize button. PhotoGlory will instantly make your old photo bright and vibrant. Need to touch up some of the details? Go to the Retouch tab and pick the manual coloring tool. Choose the hue, set the size of your brush and paint certain parts of your picture by hand.
And that's how to make old pictures look new with PhotoGlory! If you'd like a more detailed explanation of the step-by-step process we’ve just covered, be sure to check out this video for a clearer, in-depth guide:
Looks like magic, but it isn’t. PhotoGlory uses advanced technologies that make editing your old photos easy and enjoyable.
They say that photos fade, but memories don’t. But now there is an easy way to stop your treasured pictures from fading as well! Now that you know how to edit old pictures to make them look like new, you can easily fix them with PhotoGlory! Remove all the trails of time and bring back lost colors to your photos to honor your family legacy.


 Download
 Order
Order