How to Colorize a Black and White Photo
Without Photoshop in a Snap
Though digital images are vibrant, many of us still hold onto black and white photos that mark important moments. However, despite Photoshop's capabilities, its restrictions for colorizing old photos led us to explore and share methods that don’t require it. As a result, we now know how to add color to a black and white photo without Photoshop and make the old pictures look better in just one click.
Today we'll show you 7 different ways to colorize your old images. Whether you prefer using a smartphone, a computer, or online apps for photo editing, you’ll definitely find your way and be able to enhance your black and white pictures in a couple of seconds.
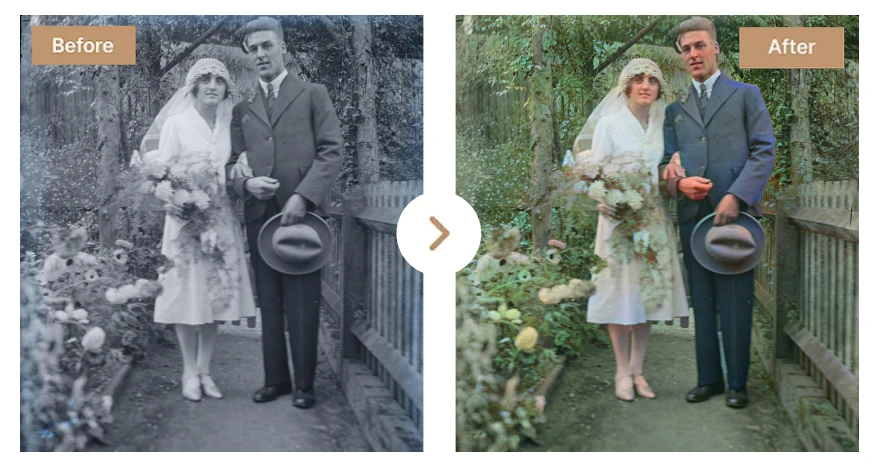
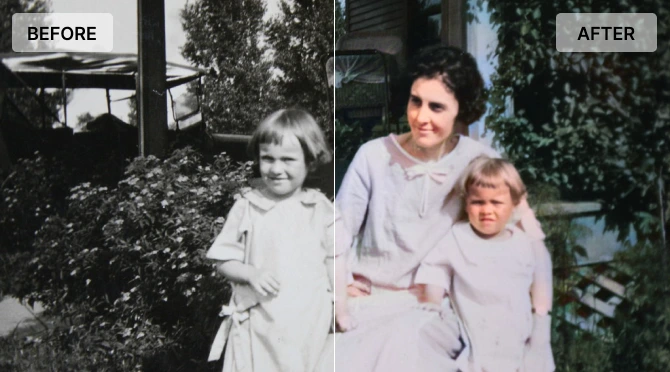
Looks stunning, doesn’t it? Want to reach the same result? Just imagine you can easily do it even if you’re not experienced in post-processing. Now you’re going to explore how to colorize a black and white photo without Photoshop. Read these step-by-step instructions for mastering photo colorization with various programs, each offering a unique approach!
Way 1. Colorize Old Photos with PhotoGlory
PhotoGlory is one of the best software to restore old photos. It offers the most convenient solution to convert your grayscale images to color with one click. With the help of this program, you can easily add colors to your old photos either automatically or manually to reach the most accurate and natural-looking result. PhotoGlory also offers a variety of tools that can be used to retouch images. Learn how to use the software to colorize photos without Photoshop below.
- Download PhotoGlory. To begin with, download the software to your computer and install it to start the restoration process.
- Digitize and upload your photo. To work with old photos in PhotoGlory, digitize them with the help of a picture scanner or simply snap a photo of your old images with your phone. When you’re done, open the image you want to colorize by clicking the Open Photo button or dragging it from a folder. Need to colorize several images? Go to the Batch Processing tab. There, select the photos you want to enhance and the folder to save them to. The batch editing tools will automate the editing process, so you will be able to use the time to concentrate on other things.
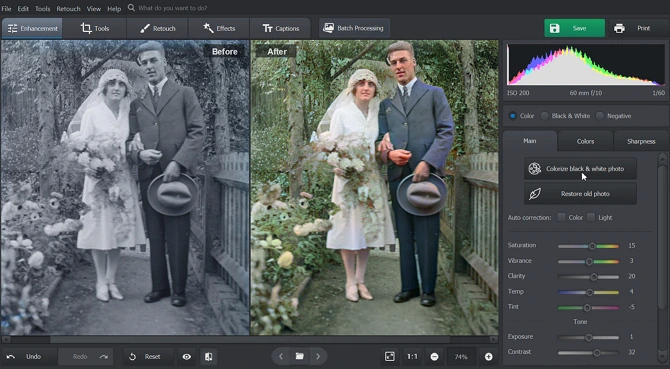
- Colorize your picture. Now, click Colorize black & white photo on the Enhancement tab. With the help of AI technologies, the software can easily recognize various items in the image and suggest matching colors for them. This way, you’ll get a realistic result.
- Correct the colors manually. In case you want to fine-tune some details, color your photos manually. Perhaps the dress was a bit different color or you just want to highlight some details. Go to the Retouch tab and choose Coloring. Set the brush size and choose its hue, then paint over the areas you need to color. Use the eyedropper tool to match the existing colors. With it, you can choose the required shade directly from the image.
- Save the colorful photo. When you’re satisfied with the result, apply the changes and save your photo by clicking the Save button in the upper right corner of the screen. Want to print colored photos or just save them to your computer? Choose the format depending on your goals. The software supports JPEG, PNG, BMP, and TIFF formats. Don’t want to lose the original photo? PhotoGlory doesn’t overwrite the existing image when you export a new one, so you will have both on your computer.
However, there are photos that need restoring before colorization. With PhotoGlory, you can easily make old pictures look new by removing scratches, stains, and tears. You can color correct old pictures that have faded tones and shades to make them look as fresh as if they'd just been printed. Found your pictures out-of-focus and want to make them crystal clear? Sharpening old photos is a great solution to this problem.
Once your photos are restored, you’ll be ready to start colorizing photos without Photoshop — and PhotoGlory makes the entire process simple. Click below to download PhotoGlory for free and start transforming your photos today!
Way 2. Add Color with Hotpot AI
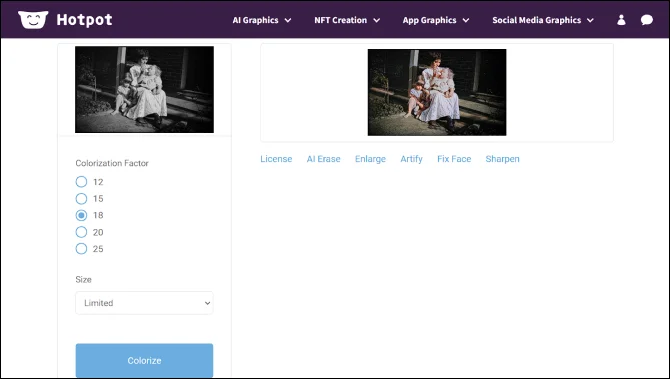
Hotpot AI is an online service for old image restoration. Your cherished photos will look better thanks to this tool that can colorize and enhance them automatically. For a better result, choose pictures free of flaws or scratches, otherwise, the app won’t be able to accurately color your photo. Besides, in Hotpot AI, you can save only pictures of limited size. If you need full size, you should buy credits.
- Load your photo to Hotpot AI. First, upload your image. To do so, scroll down the service description. Below you’ll find the Upload icon - click it and choose one photo you’d like to colorize.
- Colorize your B&W image. Once you’ve uploaded your photo, you’ll see a colorization factor, which means how much colorization you want to be applied to it. The resulting image quality may be impacted by this, so we recommend choosing between 12 and 18. Then click the Colorize button and wait for the result.
- Save the result. When you’re done, just click on the colored photo to export it to your computer. The main drawback here is that you can only save it as a PNG.
Way 3. Turn B&W Photos to Color with Deep AI
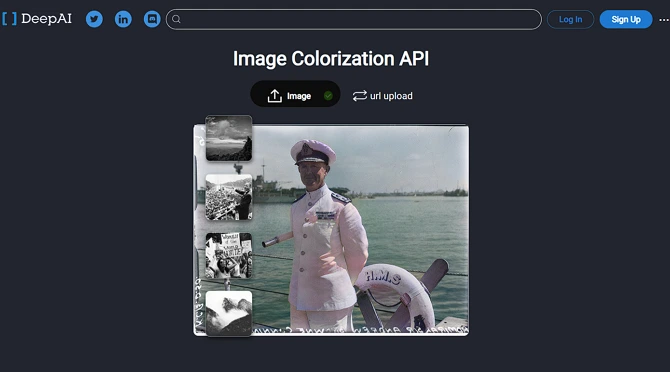
Deep AI is an image colorization API that also allows you to colorize photos and videos online. It uses a deep learning model that was trained on both color and monochrome versions of photos. The process is quick and simple—just 3 steps. However, you can only upload images that are a certain size, and the interface may seem inconvenient if you haven’t used this online service before. To learn how to make Deep AI colorize a photo without Photoshop, see the guide below.
- Import any old photo. First of all, upload your B&W picture to the service by clicking the Image icon. Also, you can paste an image link if you want to use a photo from a website.
- Add colors to the photo. Once the photo is opened, Deep AI will colorize it automatically. All you need to do is wait for the result for a couple of seconds.
- Save your edited picture. To export your color photo, right-click on it and select the Save As option in the drop-down menu.
Way 4. Do the Job with ImageColorizer
ImageColorizer is an online service that uses AI technology to precisely colorize your old pictures. To colorize your black and white images, you do not require any special abilities. All you have to do is upload your image to this online service. However, you can only upload small photographs in the free edition. To edit huge B&W pictures, you must pay for the service.
- Import your B&W photo. Select Colorize B&W Photos from the Products dropdown menu on the home page. Then upload the image you wish to color by dragging and dropping it or by clicking the Pictures icon.
- Give color to your photo. If you want to make your photograph appear even sharper without destroying its quality, adjust the Radius slider slightly.
- Save the image. Once you’re happy with all the changes, just click Download on the right to export your color image.


 Download
 Order
Order